You don’t need to be Monet to capture right textures and brush strokes in your work. UV Printing allows you to print textures, either stylized or as part of the design in your graphics and productions.
When creating a textured UV print onto clear media, often, the graphic will have areas of transparency and areas of solid color, so there needs to be a white background (underbase) to block out the parts that should not be transparent on the clear media.
This can be done using a combination of your design application and a UV queue.
Adding texture and primers in DesignPro
If you have a bitmap or a vector to start, keep the job in the same format and use one of the tasks below, depending on your original artwork.
Note: It is recommended to open the Layer Viewer during this task.
Recommended: Before converting any objects, it’s a good idea to look at the image colors altogether. For example, if there is yellow text on top of a yellow background, it is more difficult to see the texture (yellow fades into yellow, as compared to white and black). In this example, it’s a good idea to change one of the yellows so it’s clear which is more or less textured.
Bitmaps
- Add a bitmap to your workspace.
- Go to Image > Create Texture.
The Texture dialog appears. - Use the filters to edit the bitmap so the texture will appear as desired, and then click OK.
For example, usually dark spots are high and light spots are low; these can be changed by inverting.
Use histogram or curves to increase contrast and edit midtones. It is not recommended to use both histogram and curves together.
Use edge to sharpen the image and, depending on the desired line thickness, increase or decrease the radius.
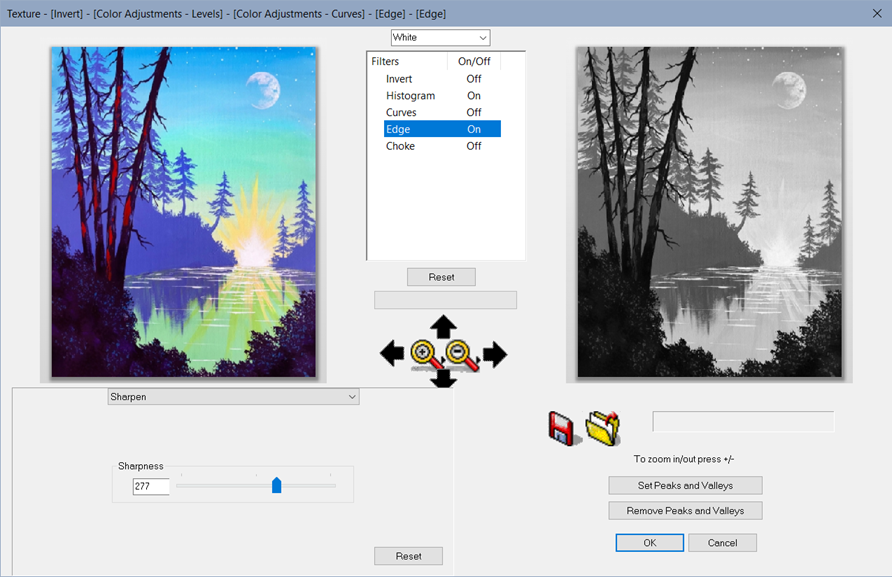
- To preview a simulation of the texture, go to View > Show 3D.
A good power setting is 20% for a more realistic simulation. - Go to File > Send to….
- Set the correct queue.
This one is going to an auto-white-clear queue so there is no need to set the underbase or clear (primer) layer. - In the queue, ensure your template is the correct size, and if you need to, you can create a new template (see Template Setup dialog).
- When ready, click Print.
Vectors
While working, to view a simulation of the texture, go to View > Show 3D and change the power setting to increase or decrease the simulated height.
You can keep this window open and click Refresh to preview your latest changes.
- Add or create a job in SignLab, select all, and go to Edit > Duplicate to New Sheet Layer and name it “Texture”.
- Using the Layer Viewer, hide Layer 1, which is the color graphics.

- If your graphic has a background that you don’t want textured, delete it.

- Go to Transform > Convert to Spot Color and select the option with the best contrast as a starting position.
The image is converted to a tint of a spot color. - To change the height of the print, edit the spot color tint value. If you change it to 50%, the height will similarly decrease.
- To get a bevel effect (in this example, the letter “B”), go to Image > Render Multi-tone Bitmap.
Recommendation: Set at least 200 DPI. - Use the tone reproductive curve to bring the bevel edge where you need it. For example, if you only want the bevel on the last 20% of the selected object, drag the 80% spot of the curve all the way down to 0.
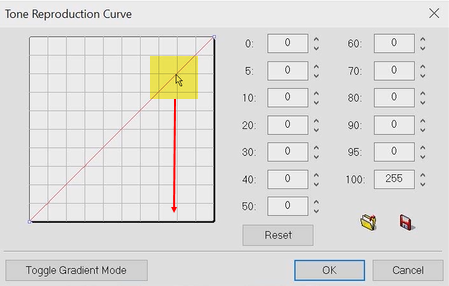
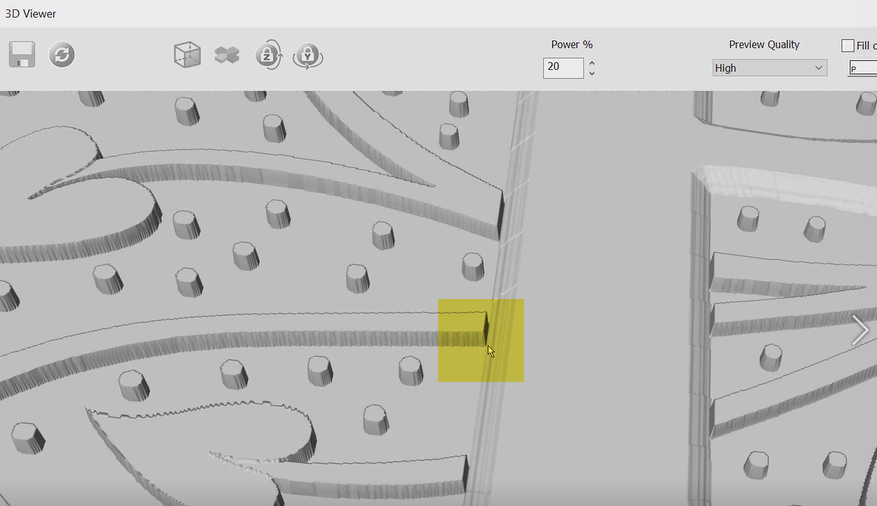
- To minimize the dip at the edge of the bevel, go back to the tone reproductive curve and drag the very top of the line to 50% so the bevel edge ends there.
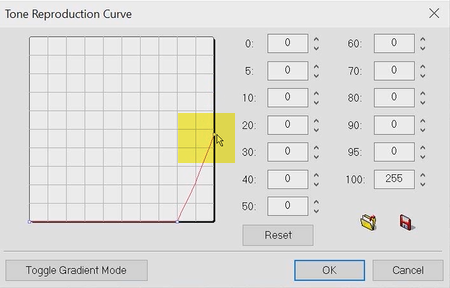
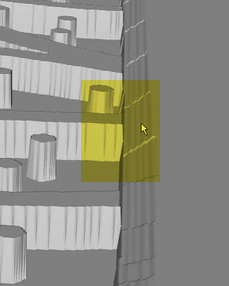
- When you’re happy with the texture, select all of the objects and click overprint
 , then re-enable the color layer.
Your textured print is ready for output with a textured print mode.
Custom “no ink”, “no clear”, or “no white”
If you want to control which parts of your job will get coverage, use the following in SignLab:
- To apply ink to the entire background but not to objects, select the objects and apply the No Ink spot color.
- To apply clear to the entire background but not to objects, select the objects and apply the No Clear spot color.
- To apply white to selected objects, select the objects that should not have white underbase and apply the No White spot color.
Sending to the queue
- Go to File > Send to….
- Set the correct queue.
This one is going to an auto-white-clear queue so there is no need to set the underbase or clear (primer) layer. - In the queue, ensure your template is the correct size, and if you need to, you can create a new template (see Template Setup dialog).
- When ready, click Print.
Digital Factory UV output
- If you want the queue to automatically produce a white underbase and color layer, use an “Auto White Clear” queue and an Auto print mode. You can set a clear finish in the queue.
- To customize your layers, select a “Custom” queue. This is ideal for any embedded underbase or clear finish data in your file. If you have underbase or clear finish data coming from your design application, make sure these are deselected in Queue Properties in Digital Factory UV.
- You can customize “Auto” queues as well, but they come with presets.
- You can also select a color only queue or a texture queue.
- If you’re printing texture, you have the ability to print multiple channels to build up the texture and speed up output, but this is only going to work well with a good UV light set up that will cure the ink quickly enough.
Checking your white underbase in a preview
- Right-click and select RIP only.
- Once the job is spooled, right-click and select View Raw Data.
- Deselect all color films, and then select only white.
- Click to view all as black.
The white underbase shows as black and can help you determine what edits are needed.
Editing the underbase
- Go to Queue > Queue Properties and select the Processing Options tab.
- You can edit the white underbase, including the strength and the choke.
- Select the Separation Curves tab and select the white channel.
- Ensure the curve data is linear.
- After you’ve adjusted your color layer and checked using raw data, you can come back and adjust the curve by editing output values. For example, you may want to put down 25% when it would normally be at 50% so you use less white ink. This will affect the opacity of the output.
Editing the color layer for transparency
- Select the Processing Options tab.
- Select Flatten so the color data gets reduced based on the transparency so you can see the background more.
- Use the Color Boost slider to increase the vibrancy of the color in areas that are transparent. This will help if you’ve applied Flatten so the color that is used is more vivid since there is less of it in some areas.
Editing the clear finish
Note: If you want to add a layer, click the plus sign and name it “Clear”.
- Go to Queue > Queue Properties and select the Processing Options tab.
- Select the Clear and Other Spot Options tab.
- In the Clear Options section, select Apply and set a maximum ink.
- Usually a clear finish is over the entire output, so spreading the ink is desirable most of the time.